• About Coco
    • Meet Coco
    • Press
    • Contact
  • All Posts
  • Interiors
    • Kitchen
    • Bath
    • Bedroom
    • Living Room
    • Outdoor Living
  • Style
    • Fashion
    • Best of
    • Travel
    • Design On Sale
    • Coco's Projects
  • Coco's Faves
    • Resources
    • Wishlist
  • Shop - Bring Style Home
  • About Coco
    • Meet Coco
    • Press
    • Contact
  • All Posts
  • Interiors
    • Kitchen
    • Bath
    • Bedroom
    • Living Room
    • Outdoor Living
  • Style
    • Fashion
    • Best of
    • Travel
    • Design On Sale
    • Coco's Projects
  • Coco's Faves
    • Resources
    • Wishlist
  • Shop - Bring Style Home
Search
Contact Us
[email protected]
310.275.4189
Newsletter Sign-Up
Please join our mailing list
home
share
Our Home Renovation

Malibu Home Renovation Project Video – Dry Wall Is Up

June 22, 2015
  • Share

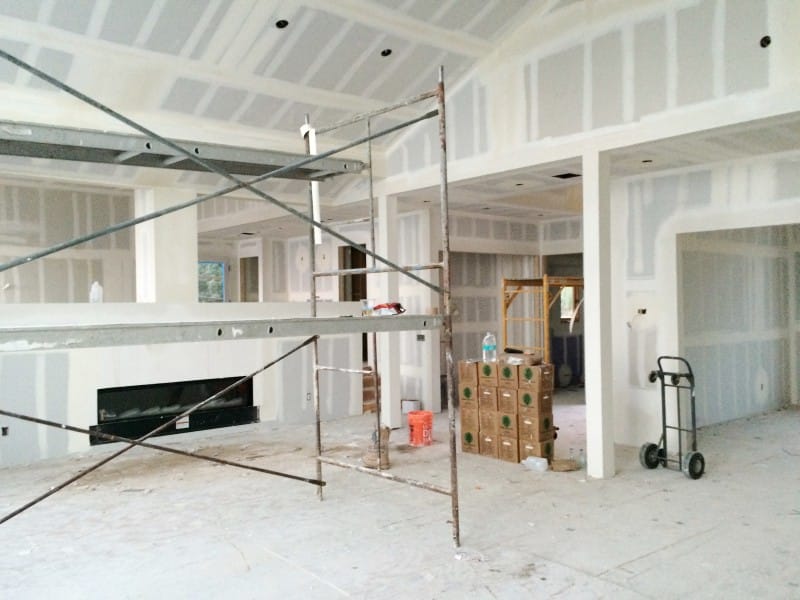
Lots of progress on our Malibu home renovation project these days. The biggest news is that the dry wall is up and taped! It is so great to see the house finally take shape as a house! The drywall is drying now and things are moving along. It is amazing the difference a few weeks make.

To give you some background if you are not up to speed on this Malibu remodeling project, my guy TE and I found this house well over a year ago. After much back and forth and truthfully me chickening out at one point, TE bought the house for us and then we began the process of remodeling. We completely gutted the 4 bedroom nearly 4000 square foot home, changed almost every room and added a few hundred square feet more…and now almost a year after we closed on the house, dry wall is finally up! Wooooohooooo!!!! Exhale. Sigh. Uh oh…so much more to do.

We are supposed to move in together in 6 weeks. There are a million things to do.  We spent the week on the phone with contractors discussing interior doors (that could be a topic of an entire post in and of itself); TE and I had early morning meetings selecting and buying door hardware for every single interior and exterior door in the house; and then we made some last minute decisions on laundry room tile.  It has been a real team effort…where TE and I have had to look at every single inch of the house and decide how we want to live.  We have been totally focused on this space for over a year.  It has been fun, scary, exciting, challenging, confusing, and most of all extremely gratifying.  We have learned a lot about each other and working together.  At the beginning, TE thought I was bossy (I am sure my mother and sis DS would wholeheartedly concur).  Now, TE still thinks I am bossy I am sure…but I know have learned that being bossy doesn’t necessarily yield the best results when you are working with someone as a team.  I am growing and he is growing too.  There are things that I am sure TE never thought he would say or think but because we are on this journey together, he is now considering.  Years ago, I worked on a television show that was all about melding his style with her style.  We would have been a great episode of that show for sure.  His style being more contemporary…mine being a little more classic…you’ll see how it all comes together when this house is all done!

Anyhoooo….we still have an armload of things to do. Not to mention furniture! Best of friend AM asked me the other day about what we are doing as far as furniture…and frankly with TE and I acting as our own project managers/designers…we haven’t even really thought as a whole about furniture…that starts now!  Here we go.

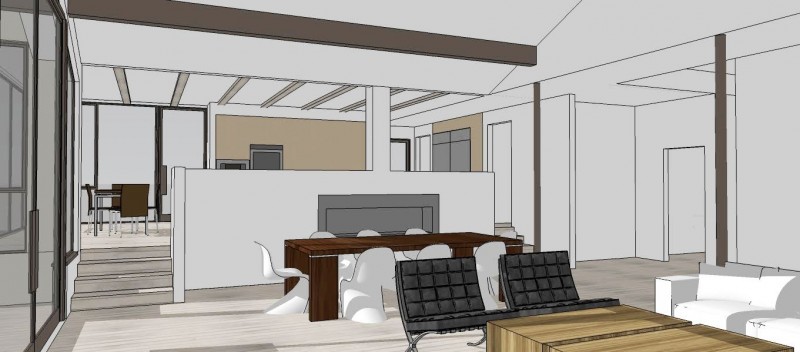
Below you will see the floor plan for the Main/upper floor of the house from way back when.  Lots of things have changed since then including changing the master bath configuration, flip flopping the master closet and the office and putting it all inside the master suite, moving the stove top off the island, and making the living space a living space only and not a combo.   It is a work in progress!!!

MALIBU HOME RENOVATION PROJECT – LEVEL 1 FLOOR PLAN

Malibu Home Renovation Project Floor Plan Main Floor
Plan for the main floor of our house in Malibu
Malibu Home Renovation 3D drawing living room
We had our architect make a 3D rendering of the living room with furniture in for scale purposes before we signed off on the plan last year!
Malibu Home Renovation Living Room Dry Wall Hung
The living room now with drywall hung. Still have to install floors, paint and so much more. Moving in in 6 weeks!

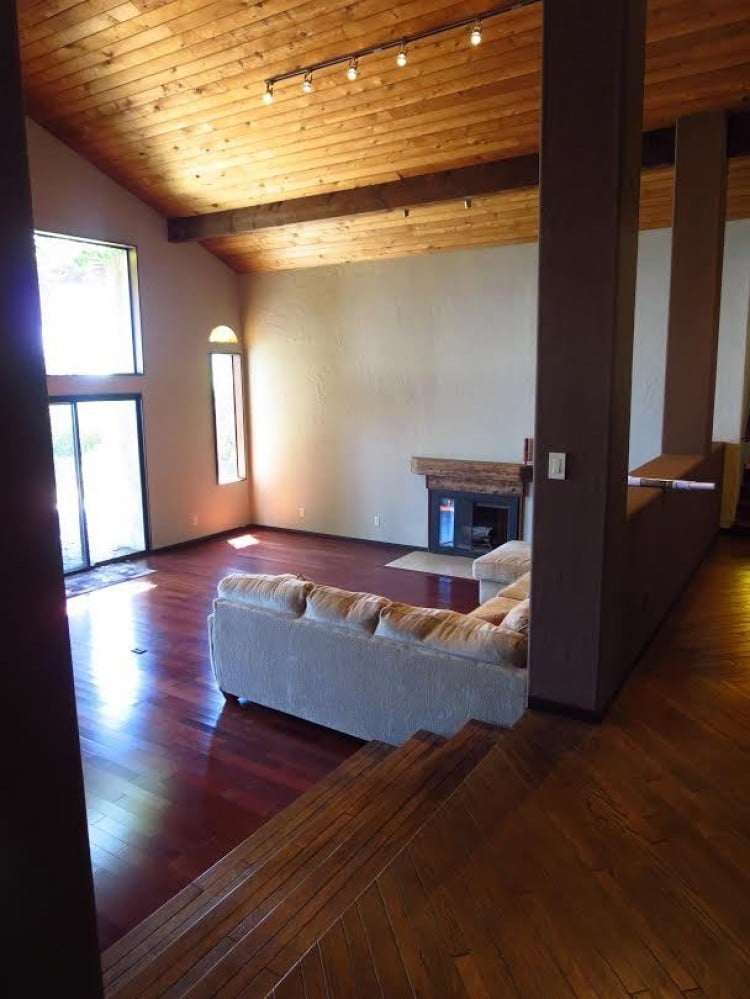
BEFORE THE RENOVATION (below)


Malibu Home Renovation Living Room Before
Before – This is the living room before the remodel…it was two levels with dark ceilings, two types of wood floors, small windows, and large columns.

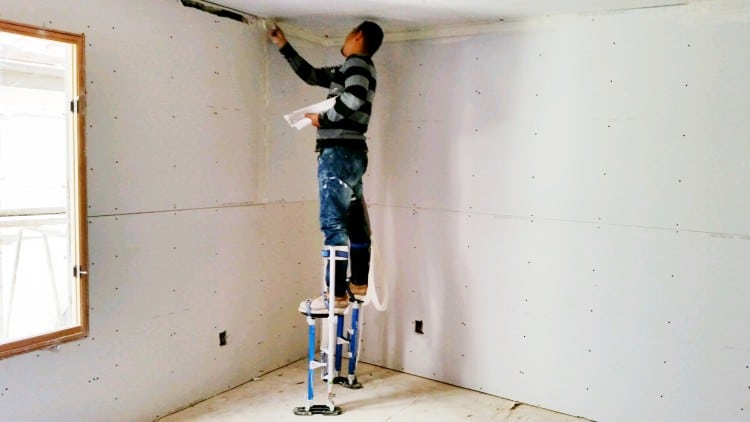
Our contractor sent me this last photo.  He had told us that the dry wall guys do their work on stilts.  I didn’t believe him and couldn’t be out at teh house the day the dry wall was being done, so he sent me a picture.  Did you know that dry wall contractors work on stilts?   I certainly did not!

Malibu Home Renovation Hanging Drywall
Worker on stilts taping the dry wall in a downstairs room.

Going to try to do a few posts on the house progress this week. So stay tuned!

Happy Monday!

xo
Coco

previous
next

related posts

from the shop

Meet Coco - Bring Style Home

A Los Angeles native, Colette Shelton, also known as “Coco”, is an entrepreneur, design blogger and home furnishings designer.

Read More  

Looking for Something?

View All Posts

Perfect Outdoor Wicker

Use code COCOCOZY15 at check out for 15% off of outdoor furniture!

Shop Spring/Summer Outdoor
Join our mailing list
Sign Up Now

Recently Pinned

Gift a bouquet - Just do it :)

Shop my latest design!  
Use code: GIFTCARD for up to $500 giftcard at Veronica Beard through 4/20/21
write a comment
  • Share

12 responses to “Malibu Home Renovation Project Video – Dry Wall Is Up”

  1. Carol says:
    June 22, 2015 at 7:42 AM

    Really beautiful already. Can’t wait to see the finished product.

    Reply
  2. Barrbara Kasprzynski says:
    June 22, 2015 at 8:08 AM

    Congrats, I’m excited for you! Most interested to see how you finish your master bath. Noticed the tub/ shower room combo. Want to see how the tub sets to the floor. I want to do this and I’m worried about cleaning the floor where the tub sits. Enjoy the journey!

    Reply
  3. Jacquelyn says:
    June 22, 2015 at 8:56 AM

    Drywall in means you are half way done. Good luck on ur amazing home

    Reply
  4. MJH DesignArts says:
    June 22, 2015 at 10:29 AM

    It looks amazing. What a difference a week makes. Congratulations. xoxo Mary

    Reply
  5. Nicole! says:
    June 22, 2015 at 3:07 PM

    Looking fabulous! Can not wait to see the finished space – I’m officially inviting myself over!!! xoxo

    Reply
    1. COCOCOZY says:
      June 22, 2015 at 3:25 PM

      You are invited. Officially. 🙂

      Reply
  6. Djuana says:
    June 22, 2015 at 3:26 PM

    It’s going to be lovely! It’s already beautiful, congratulations and thanks for sharing the progress.

    Reply
  7. Shauna says:
    June 23, 2015 at 11:53 AM

    Wow, Coco, just beautiful! I can see how excited you must feel. It brings back some strong, sweet memories, since about 4 years ago my husband and I built a home in the mountains of the Pacific Northwest. Yes, it take a lot of teamwork to get things like this done, but what a bonding, beautiful project! If you two can survive this project, I’m sure you can survive anything! (That’s what people told me when we were going through the process…). Anyway, do enjoy, because this creative moment is what living is for.

    Reply
  8. bryanashleyy says:
    June 29, 2015 at 2:39 AM

    Just amazing.Hope it will looks so beautiful after finishing.

    Reply
  9. Melinda McQueen says:
    July 1, 2015 at 6:11 AM

    Hi Coco,
    I’m so glad I stumbled across your blog. I’ve been stuck with how to show renovation progress of my renovation over on my design blog (all the way from Western Australia). I love how you showed the whole story in pictures. Using the floor plan, 3D view and before pictures, really works well together. You have filled me with inspiration – so thanks for that- now I have a try myself and put myself out there.
    Thanks again Melinda McQueen xx

    Reply
  10. sue says:
    July 6, 2015 at 5:55 AM

    I’ve been reading your blog for a couple years and I really enjoy it but I’ve never commented before, but now that you are posting your renovation I have to tell you how much I enjoy the process and cannot wait to see the final reveals. Your space is gorgeous and since I’m from New Brunswick Canada (near Maine) I love seeing how you are connecting your house to the stunning landscape! I hope the rest of the renovation goes smooth and I will enjoy watching it evolve. Thank you for sharing.

    Reply
    1. COCOCOZY says:
      July 6, 2015 at 7:42 AM

      Thank you so much for reading COCOCOZY over the years. I am so happy the hear you are enjoying our home renovation story. Thank you for the sweet comment. New Brunswick looks beautiful. I have never been. Will let you know if I every pop up your way! Have a great week ahead SM. Please continue to comment. I love hearing from readers. You guys have become my friends over the years!

      Reply

Leave a Reply Cancel reply

Your email address will not be published. Required fields are marked *

This site uses Akismet to reduce spam. Learn how your comment data is processed.

Instagram

Keep it simple. No need for bells and whistles an Keep it simple.  No need for bells and whistles and fancy things to make your house a home.  In this picture, a plant, two chairs I found at the flea market, a layered rug situation and some modern art...de-cluttered space can be equally as inviting as one filled with memories and treasures.  If you are stuck with how to decorate, I say keep it simple.  Purge and start with the basics.  Full disclosure, this is a shot of my living room from a few years ago when I first moved in...I didn’t even have drapes up when this was taken.  I have since added pieces and changed out furniture and added a 2nd sofa...but it started super simple and it was lovely back then.  When the world is swirling around us and making no sense, how are you keeping things simple at home?  #socococozy #bringstylehome #cococozy
Pre-pandemic throw back photo to where I was last Pre-pandemic throw back photo to where I was last year.  Clueless as to what was to come.  Was in Paris, with my mom, enjoying her summer apartment in the middle of the 6th arrondissement.  I had just left the U.K. visiting friends for a few days in London and the Cotswolds.  None of us knew that this summer 2020 would be so different.  Today, I can only hope this time of tumult and great divides leads somehow to a future of calm and harmony.  Going backwards in time is not an option.  Pushing forward is.  Happy Sunday to you.  Where were you last summer?  Where do you imagine you’ll be next? Xoxo #socococozy #bringstylehome
Incredible living room before and after as designe Incredible living room before and after as designed by my good friend Steve Jones @bettershelter!  I went on a tour today.  I also went on a tour a year ago when he first got the house.  See my stories. Swipe to see what this room looked like before.  Life lesson from a room transformation:  When faced with the daunting and not so pretty, look to do the work, and you can make changes to bring  out what is good.  Right?  This home by the way is going on the market soon and is in one of my favorite parts of town, View Park.  What changes have you made lately that have turned bad into good? #socococozy #bringstylehome #remodeling #homerenovation #californiadreaming
“Be patient with yourself it has been a funky fe “Be patient with yourself it has been a funky few months in the world.” My friend Manon texted this advice to me today.  She is right.  A little patience and a lot of kindness to yourself and to others during these unusual times will go a long way.
***
Am in my living room right now looking at these pretty flowers in that white urn I found lying around.  The urn works (see Flower Power highlights for backstory). Thinking on who I might send one of these bouquets to today as a little act of kindness.  Still working on the patience piece of her advice! 🤪 Who might you send flowers to?  How can you be more patient with yourself? Happy Saturday!
*
*
*
“The Classic bouquet by COCOCOZY” is a limited edition design available at @ftdflowers and @proflowers. 🌸 (tap link in profile to see more) #socococozy #cococozy
Hi! Finally something to smile about! 😂 Exciti Hi!  Finally something to smile about! 😂 Exciting flower news today as I debut the first ever COCOCOZY designed bouquet in my latest partnership! Tada.  Here is The Classic by COCOCOZY exclusively on @ftdflowers + @proflowers as part of their #herestoher initiative!  Swipe left to see it up close.  I wanted to design a super lush classically beautiful bouquet that would look good in any home during the fall/winter.  Roses, eucalyptus and so much more in soft whites and greens.  I am so happy with the final product.  What’s great is that this hand tied bouquet comes in a box straight to your door and you can put it in any vase.  If you swipe left you can see it in my breakfast room.  Perfect for sending as a birthday gift, celebration, expression of love or friendship, a business gift, a thank you to someone or I recommend ordering for yourself every couple of weeks to cheer up your space as we stay at home more!  I plan on getting them weekly!  Anyhoooo...I’m linking to the bouquet in my profile.  Have you ever ordered flowers for yourself just because?  Who might you send these to?  #socococozy #bringstylehome #cococozy
Follow on Instagram

Interiors

  • Kitchen
  • Bath
  • Bedroom
  • Living Room
  • House Tours
  • Outdoor

Style

  • Fashion
  • Best of
  • Travel
  • Design on Sale
  • Coco's Projects

About

  • About Coco
  • Press
  • Contact
  • View All Posts

Join our mailing list

Sign Up Now
© 2021 Cococozy | Terms & Conditions